

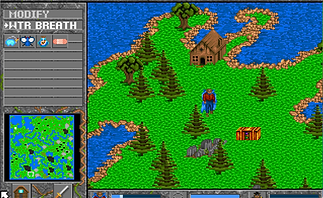
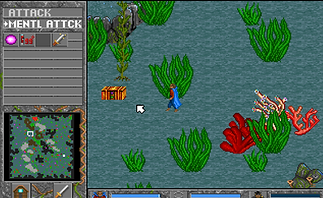
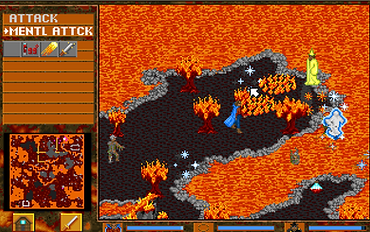
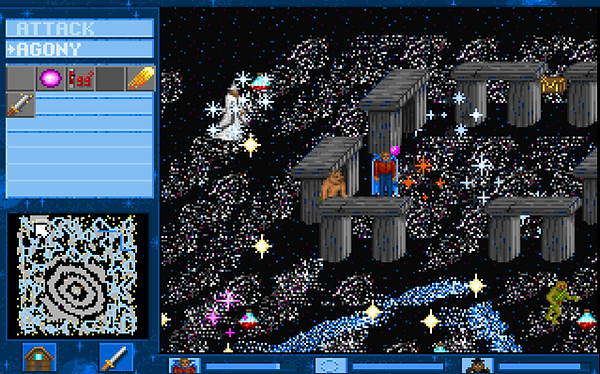
Before getting to the walkthrough, itself, we should take a moment to glance at the controls, as they change depending on if you are in Terra, your Lab, or Valoria (apologies for the bad diagram above).
SpellCraft is very easy at first, as it eases you into the gameplay. However, by the end of the game there is so much going on, that death is sometimes only milliseconds away. I have found that relying on a mouse drastically increases the difficulty, as you have to locate the cursor, get it to where you want, then select the spell you want to use. Which takes a lot longer than hitting a button on the keyboard. For this reason, I strongly recommend you don't use a mouse for this game while in the Valoria Domains. However, if you do not have a keyboard with a number pad on it, a mouse may be required.
Important keyboard commands:
Numpad/Left-Click: Move around your Lab or Valoria. I strongly recommend not using the mouse to move around the Air and Ether Domains. There are a lot of places to fall, and the mouse is a little too touchy for fine movement.
F1-7: Select a type of spell. F1 for Attack Spells up to F7 for Totem Spells
X: While in Valoria, Return Home to your Lab. Clicking on the Home button will work too
0/Insert: Draw Sword. Your spells are important, but Wizards can only be defeated with a sword. Also, sometimes it's better to save your spells and just hack and slash your way through the realms. Right-Click on the mouse will also draw your sword.
Shift Key: Holding down the Shift key switches your keyboard to spell mode. Hitting the arrow keys while holding shift will work the same way as hitting the Function Buttons. You can scroll back and forth between Spell Types, and then select individual spells. Once you cast a spell, you can hold Shift to move the spell cursor around to different targets.
Space Bar: If you are in Terra, hitting the Space Bar will move your cursor to the next city. Just clicking on a city works as well.
In Valoria, hitting the Space Bar selects a new target for a spell you're casting. If you are not casting a spell, hitting the space bar changes the view screen on the bottom left of the monitor. There are three screens to switch through: Status, # of items/enemies left, Map of the Domain.
+/-: Add/Remove ingredients, or increase/decrease how much you are purchasing from an Ally.
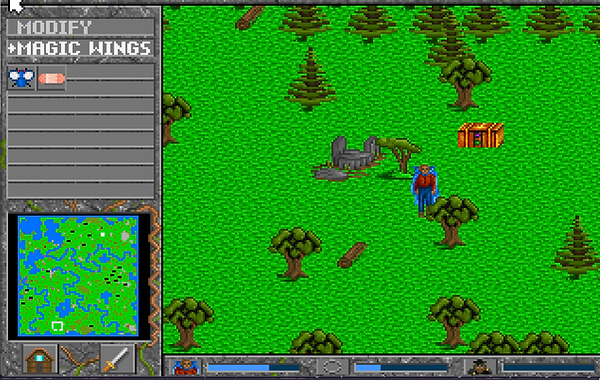
*: Cancel Magic Wings. Sometimes you want to land (to kill a Wizard or pick up a Big Box). Hitting the asterix button will end the spell early.
On To the Walkthrough
(Obviously, Spoilers Ahead)
Part One: Yer a Wizard Har... er... Robert
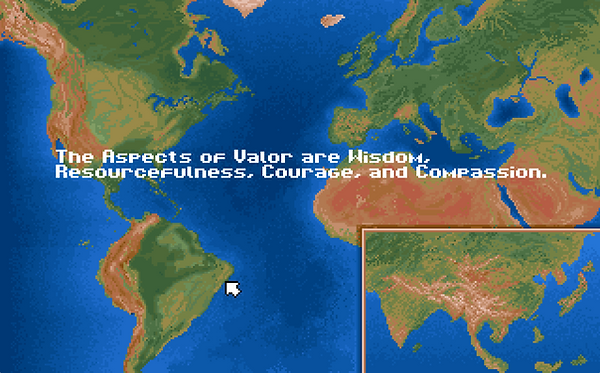
The intro to the game explains that the four Aspects of Valor are Wisdom, Resourcefulness, Courage, and Compassion, letting you know that these are the traits that you'll be tested on throughout the game.
Immediately after this, you are introduced to yourself, a man named Robert Garwin, who has lived a modest life with no great accomplishment or failure. In other words, you're boring. You've done nothing with your life, but you've never failed, either.
Your life is changed forever, however, when you receive a letter in the mail from an Uncle named Gar. You never knew you had an uncle named Gar, but he sounds desperate to meet you.
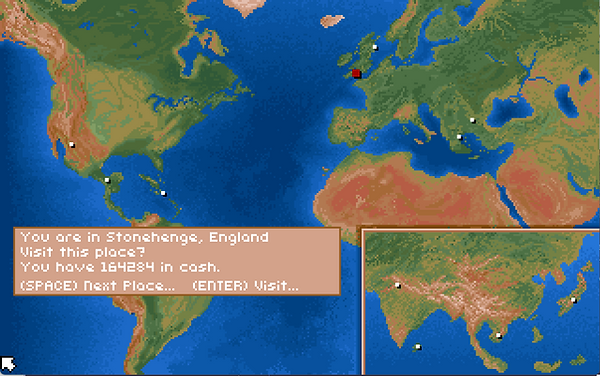
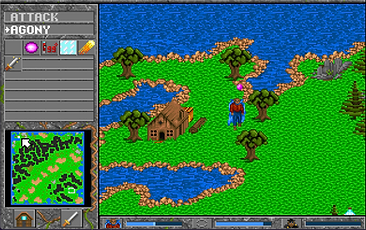
With nothing better to do (since your life is boring, remember?), you decide to go ahead and catch a flight from New York to London, and then drive to Stonehenge, where your Uncle Gar is supposed to meet you.
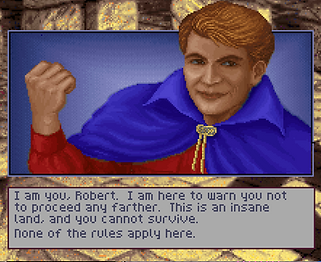
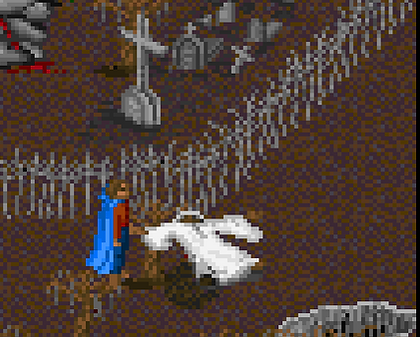
However, when you arrive:
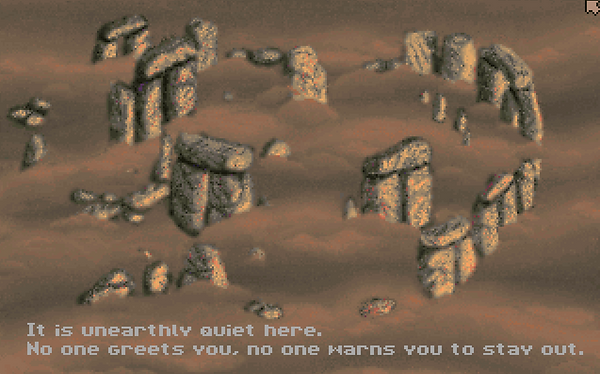

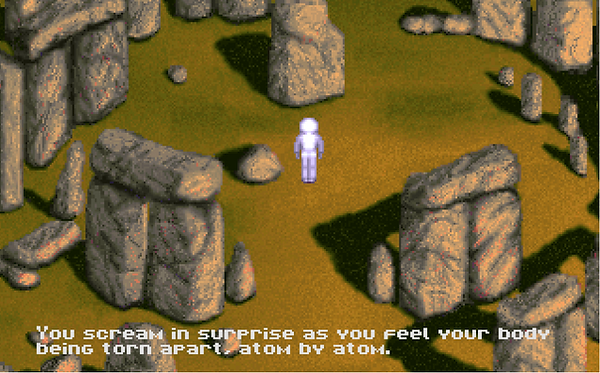
It's kind of unclear if the lightning teleports you to Valoria, or kills you. Seriously. When you get to the later parts of the game and talk to some of the Lord and Minion Wizards, it sounds like they had to die in Terra in order to become wizards in Valoria. Since you are about to become a wizard of Valoria... Well, let's just say it's possible that your "uncle" Gar killed you.
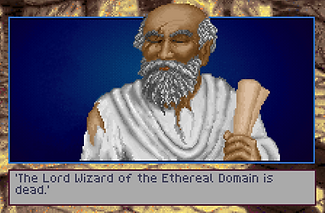
After the screen goes black for a second, you open your eyes to find that Stonehenge has changed. It now has a tile floor, a large stone throne in its center, and an old man in white robes ready to greet you.
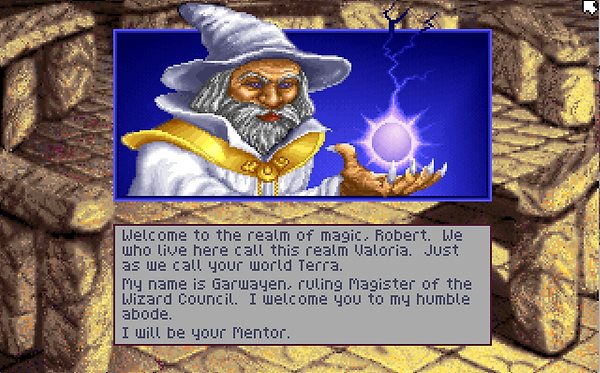
Congrats! You're a wizard now. By the way, you have no say in the matter.
Garwayen will give you the option of (A) Going through the tutorial, or (B) Jump straight to the first quests.
Select A for a very slow intro into how everything works, or B to just get into it. For this, I'm hitting B.
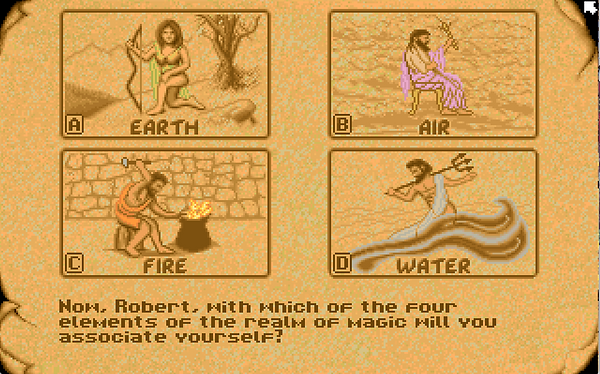
Your next step is to select a College of Magic. Although there are six Magical Domains, two of them cannot be selected, leaving you the options of: Earth (A), Air (B), Fire (C), or Water (D). There is no right or wrong answer here. Each College has its ups and downs. Earth Magic has a couple of early spells that deal damage for you, Air Magic gives you instant access to Magic Wings, a necessary spell to beat the game, Fire Magic gives you a powerful, enemy-seeking spell and an area of effect damaging spell, and Water Magic gives you almost nothing right away, but makes the spell Water Breath cheaper to create (another spell necessary to beat the game).
So, pick whichever one you resonate with.
After selecting your Magical College, Garwayen will tell you that someone in Terra has information you need, and gives you an unnecessary Pomegranate to finance your trip.
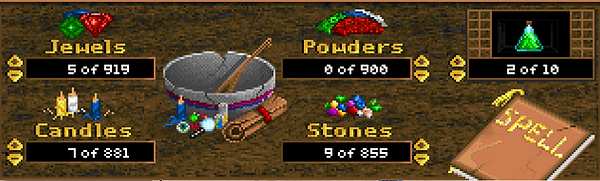
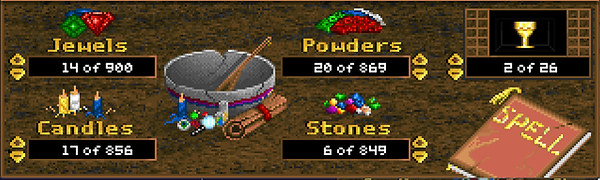
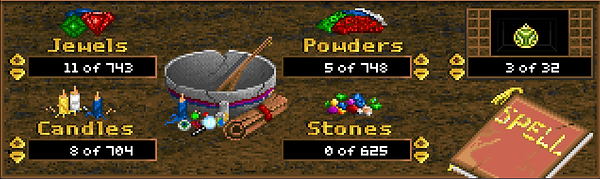
This is a good time to visit the four allies you start with and to buy Components. I recommend having around 1,000 of each Jewels (super expensive), Powders, Candles, and Stones. Depending on which Magical College you picked, you should buy some aspects as well. Greenbriar (in Stonehenge) sells Earth Aspects, Selina (in Salem) sells Air Aspects, Espirita (Medicine Woman in Mexico) sells Fire Aspects, and Thockmorton (Tourist in Pompeii) sells Water Aspects.
In the meantime, the one you need to talk with is the Medicine Woman in Mexico. She will tell you that she needs a Fire Opal from the Fire Domain.
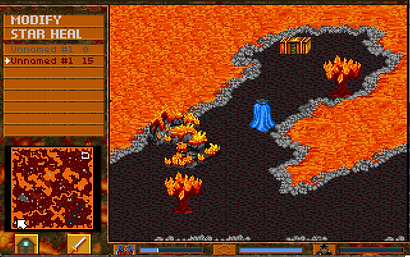
Go back to Stonehenge and return to your Lab. You need to go to your Workshop (left on the Stonehenge Screen), and increase your spells.
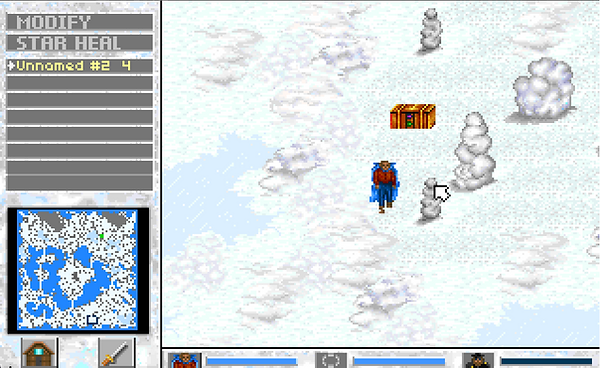
No matter what college of magic you picked, create Star Healing (1 Garlic Clove, 3 Stones, Magic Word of Sceo). Then, make all the Level 1 spells of your college of magic (look at the Spells Section).
To increase how many copies of a spell you have, and to modify the spells you have, go into your Spellbook while in your Workshop.

Once you're all set up, Garwayen has a task for you: Find all the items he put into the Domains he opened up for you. (you don't have to kill all the enemies, and you don't have to collect small boxes. Just the Big Boxes.

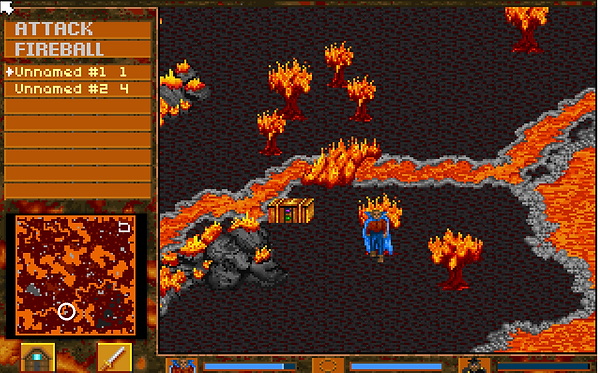
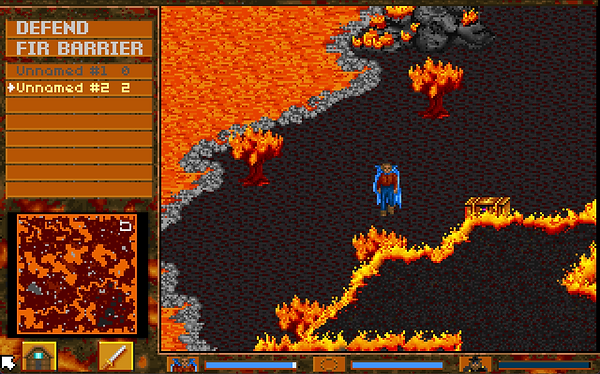
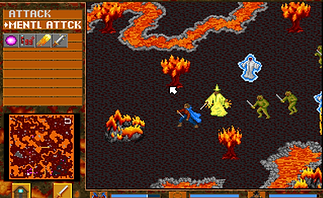
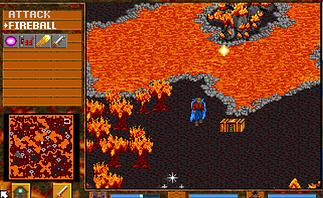
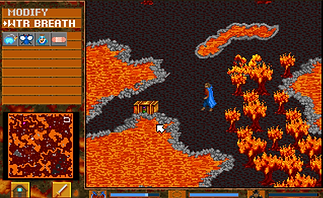
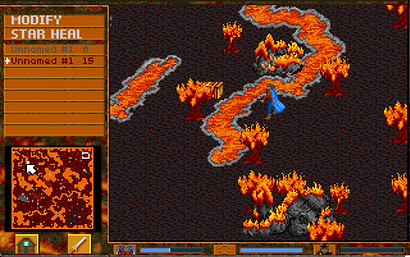
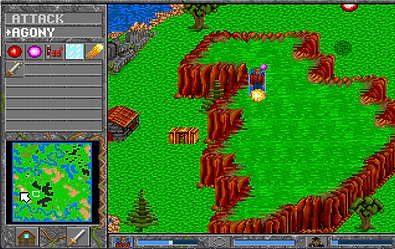
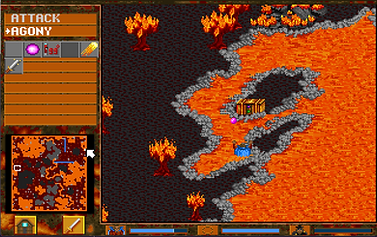
Go to the Fire Domain first, since that's where the Fire Opal is. The box is exactly where the Medicine Woman said it would be: On the other side of a bridge made of fire. It's just to the left of the big X of lava.
Once you have the Fire Opal, either clear out the map (by killing everything and picking up all the items), or simply just Return Home by clicking on the house in the bottom left, or hit the 'X' button.
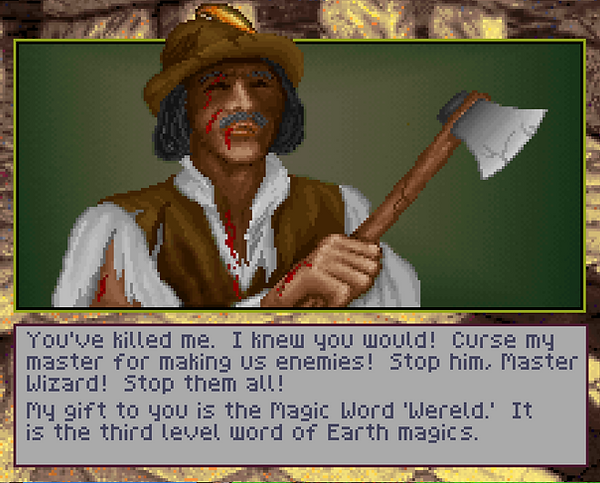
Before going in to clear the Air Domain, go back to Terra and take the Fire Opal to the Medicine Woman in Mexico. In exchange, she will teach you the first magic word for the Mind Domain, Mens. Unlike other Domains, the Mind Domain only has three magic words, so you're learning the level two word.
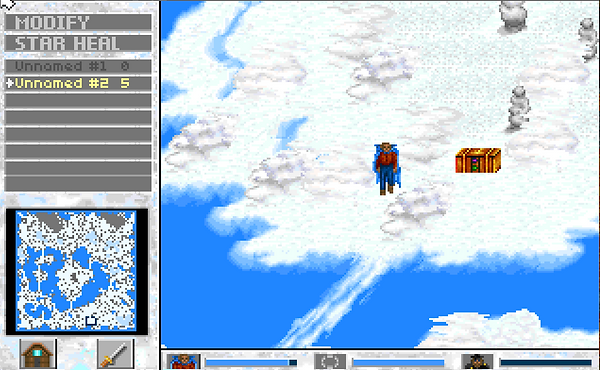
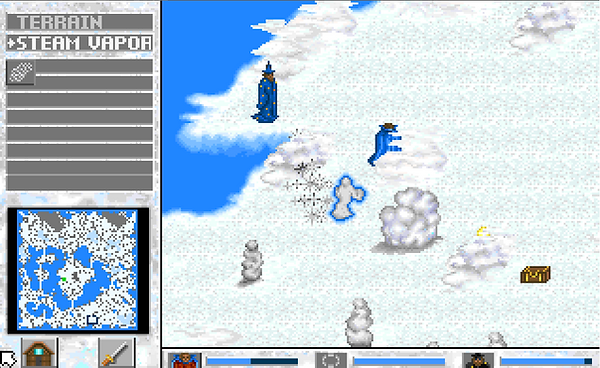
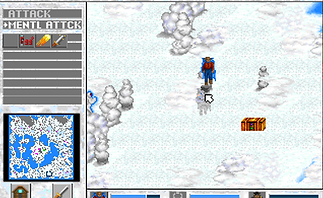
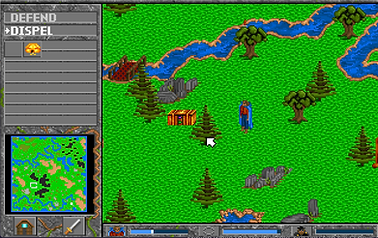
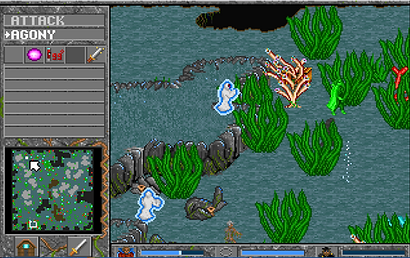
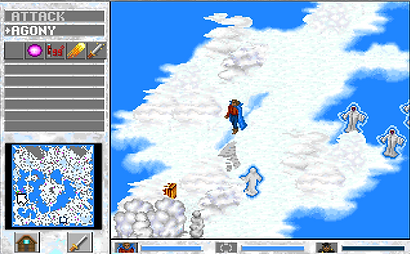
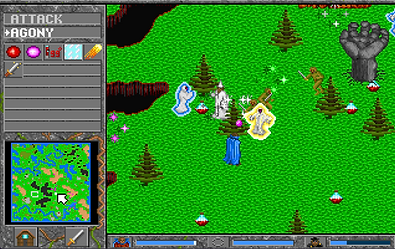
Your quest is not complete, yet, however. You still need to get the Big Box for the Air Domain. So go back to Stonehenge, restock your spells if you need to, then head into the Air Domain. The Big Box is located on the bottom of the big island in the middle of the map. The only enemies here are Illusions, which cannot be hurt by most spells like Magic Sword, Orc, Fireball, Lightning, or Ice Arrows. They are, however, fairly weak, so just hitting them with your sword is good. Ready Star Healing and use it as needed on your way to the Big Box.
This box contains 12 Bottles of Green Liquid, the Aspect required to create the spell Dispel. Though not overly powerful on its own, Dispel is one of the few spells that will actually hit Illusions, and it is required to create it at least once before the game will allow you to move on. So it's a good idea to do this now. Because it is a level 2 spell, you need to use 2 Aspects, not 1.
Dispel: 2 Aspects (Bottle of Green Liquid), 5 Jewels, 7 Candles, 9 Stones - Magic Word Mens
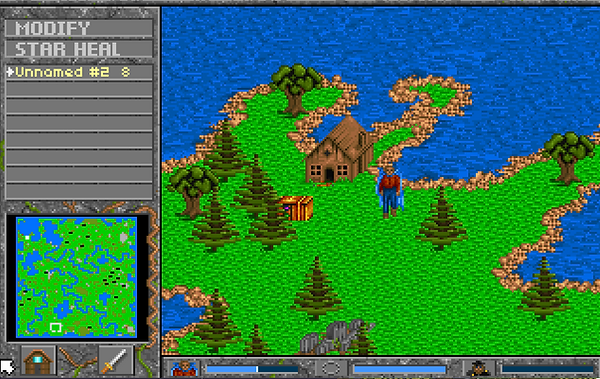
Once you have created Dispel, two new allies will have joined you back in Terra. First, speak to Garwayen in order to get another pomegranate. You need to visit both of the new people, Chen and Ali. First, go to Ohio and speak to Chen. He will say that he wants the Scroll of Thoth for his studies. While there, buy as many Golden Chalices as you can. Then, go to Egypt and speak to Ali. He will tell you that he will give you the Scroll of Thoth in exchange for the Plaque of Quetzalcoatl, which can be found somewhere on the western side of the Earth Domain by a wooden house. Buy all of his Golden Chalices as well, then head back to your lab. You're likely to be short on money by now, so sell your pomegranate if you need to.
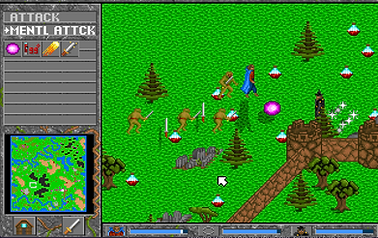
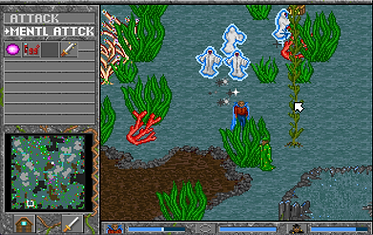
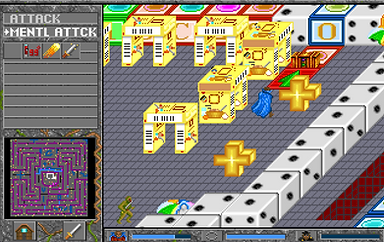
Once back at Stonehenge, create and then modify the Mind spell, Mind Attack.
Mind Attack: 2 Aspects of Mad Dreams (Golden Chalice), 5 Jewels, 11 Powders, 8 Candles - Magic Word Mens

After creating Mind Attack, immediately modify it in your Spellbook to its maximum potential:
14 Jewels, 20 Powders, 17 Candles, 6 Stones
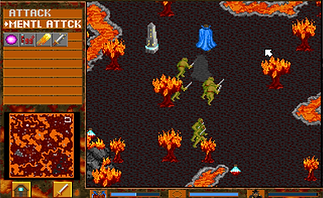
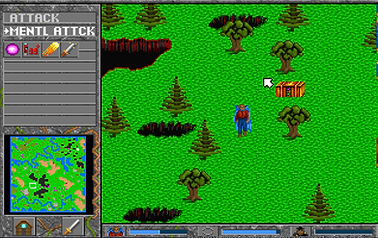
Once you have Mind Attack, Garwayen has a new task for you. Enter the Earth, Air, and Fire Domains and kill the practice wizards that he summoned into the realms. They are just simulacrum, so they aren't real people. But their magic is very real, so make sure you have some Star Healing ready to go.
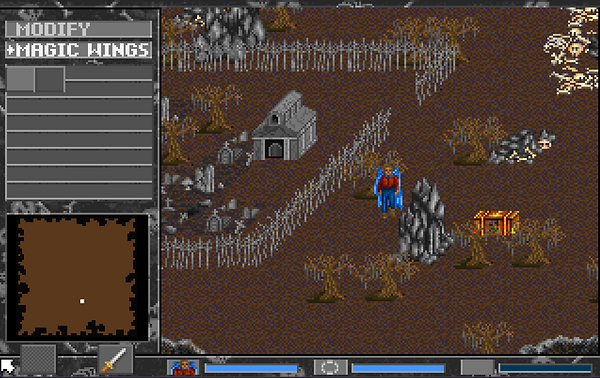
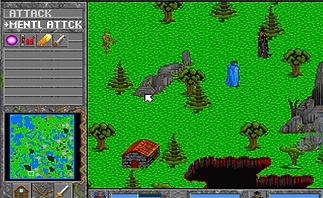
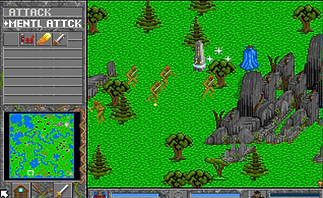
Go to the Earth Domain first to kill the enemy wizard and find the Plaque of Quetzalcoatl. One thing to remember, an enemy wizard, even these fake ones, can only be killed killed by a stroke from your sword. So get up to him, hit him with a Mind Attack or two (save as many of them as you can, it'll be a while before you can make more), and stab him.
The Wizard is in the center of the Earth Map, and the Big Box is in the Northwest corner.
Once you have the Plaque of Quetzalcoatl, return to Terra and speak to Ali in order to trade it with him for the Scroll of Thoth. Take the Scroll of Thoth to Chen in Ohio for the reward of $15,000. Then, take the rubbing of the Plaque that Ali made for you to the Medicine Woman in Mexico. She will tell you that the Plaque you gave to Ali is a fake, and that the real one is in the Fire Domain inside of a molten X.
So that means the next Domain you should go to is the Fire Domain. This time there are two Big Boxes to collect, in addition to a wizard to kill. The simulacrum is directly to your left (and a little down) when you enter the Domain. There are some new enemies now, Undead. They are tougher than Orcs, and at higher levels can poison you (which is really annoying).
One Big Box is, of course, inside of the giant X of lava in the bottom part of the map, while the second is behind the large gray rock/mesa on the left side of the map.


After obtaining the real Plaque of Quetzalcoatl, return to the Medicine Woman in Mexico and she will read the inscription. You will gain the 1st level words of every college of magic.
To create a spell in an elemental college outside of your own, you need to add 1 extra Aspect. So, if your college of magic is Earth, it will cost 2 Aspects to create a level 1 spell in Air, Fire, or Water (3 for level 2, 4 for level 3, and 5 for level 4).
Make any spells you want, but if you do not already have it, create Magic Wings and Cure Poison (if your college of magic is the Air Domain, you should already have them).
Magic Wings: 1(2) Fern Aspect, 5 Jewels, 3 Powders - Magic Word Aer
(you should modify this asap)
Cure Poison: 1(2) Mandrake Root Aspect, 3 Stones - Magic Word Aer
Once you have both of those, as well as any other level 1 spells you want to make, go fight the final simulacrum in the Air Domain. The wizard is in the middle of the map, while the Big Box is in the top right, and it contains a pomegranate. (POTENTIAL EXPLOIT: If you don't mind Garwayen repeating himself a few times, you can run around the map to the Big Box over and over without killing the wizard, and each time you go you will get another pomegranate. This can be done as many times as you want, generating infinite money early game).
As a reward for killing the third simulacrum, Garwayen will give you your first equipment upgrade, the Scarab of Nefertiti, which will increase your attack damage with your sword. He will then explain how equipment works in SpellCraft. You can't unequip anything until you find a more powerful version of it. At that point, you'll automatically equip the strongest item.
Next, he will inform you that he will no longer save your life if you die somewhere. From now on, if you die, you will be sent to the Death Domain. There, magic doesn't work. You must rely only on your sword. He will then tell you the formulas for all 1st-level spells in the game.
To get you used to the idea, he has placed a Big Box in the Death Domain that you need to get, as well as a Big Box in each of the three Domains you can access, Earth, Air, and Fire. You need to get all four Big Boxes, and, in the non-Death Domains, you need to kill all of the enemies on the map to prove your skills.
Before doing any of that, go into Terra and talk to David Greenbriar at Stonehenge. You will gain your second piece of equipment, the Hauberk of Safety, an armor to reduce the damage you take in combat.
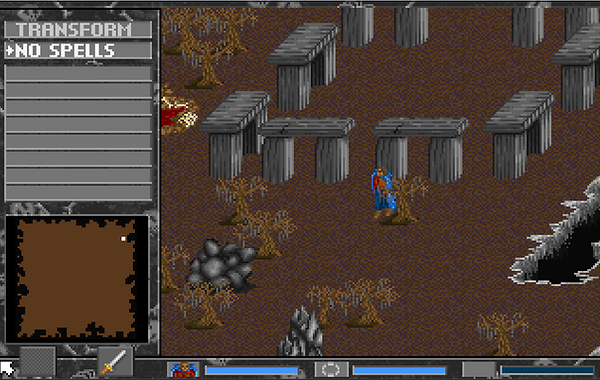
The easiest way into the Death Domain is to mess up while creating a spell. Go to your Workbench and select any Aspect. Add nothing to the spell, and just use a magic word. You will die, horribly, and then you'll "wake up" in the Death Domain. The Big Box is directly to the south of where you start. To leave the Death Domain, you must enter Stonehenge. Right now, the Stonehenge is in the top-right of the map. Keep an eye on your health. If you die in the Death Domain, it's game over. But, if you're feeling ambitious, there are 6 Undead and 7 Small Boxes in the Death Domain during your first run at it (it gets a lot harder, really quickly).
Getting the Big Box in the Death Domain will give you the 2nd level magic word for the Water Domain, Lacus.
It doesn't matter what order you do the next three Domains. You have to kill all enemies in them, and collect the Big Box as well. Failing to do either of these things will result in a failure. However, because the Big Boxes contain very important, and relatively rare, Aspects, you may want to just collect a few Big Boxes and leave without killing all the enemies. Garwayen will be disappointed, but it might be worth the scorn.
In the Earth Domain, the Big Box is in the northeast, while in both the Air and Fire Domains they are near Stonehenge.
One thing to watch out for, especially in the Earth Domain: Stonehenge can now be destroyed by enemies running into it. If this happens, you have to enter the Death Domain and return to the Stonehenge there to repair the one that broke. Otherwise, it's game over.


With the completion of the four Domains, you now have the word and ingredients needed to create Water Breath. Garwayen will teach you the recipe for the spell:
Water Breath: 2(3) Fish Mouth Amulets, 11 Jewels, 5 Powders, 8 Candles - Magic Word Lacus
(If you mess up, or want more Amulets, the Old Man in Pompeii now sells them)
Immediately modify the spell to its maximum.

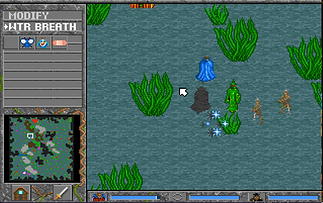
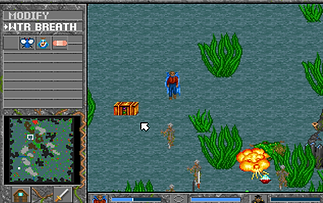
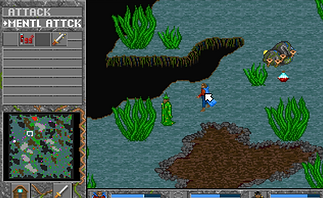
Once you have Water Breath, you are given a new task (that isn't all that surprising): Kill a simulacrum in the Water Domain. The part that makes it annoying is that there are also four Big Boxes you need to collect, forcing you to truly explore the Domain.
BEFORE STARTING, TALK TO GARWAYEN, OR A GLITCH WILL MAKE YOU DO THIS PART TWICE!
The Wizard is just to the bottom-left of where you start. The Big Boxes are in the Bottom-right, left-middle, top-middle, and right-middle.

For completing this task, you gain a pomegranate, a helmet, Alexander's Cap of Defense, some formulas, and, most importantly, the second level word for your college of magic.
Garwayen will explain that level 2 spells require using 2 Aspects to make, and that you can Modify spells you have simply by using a more powerful magic word on them. Level 1 spells can have the level 2 word used on them while Modifying them, without adding any extra Aspects or Components, and they will be stronger for it.
After you've played around a little bit, you are given your next task: kill yet another set of simulacrums, one in each Domain. Stock up anything you need to in Terra, restock your spells, and then defeat the simulacrums. You can do them in any order, and you do not need to kill all the enemies or collect the Big Boxes unless you want to. The Big Boxes in this round only contain a few Components, and aren't really worth your time unless you feel like being a completionist.
Earth Domain - Wizard in the middle again, Big Box in the middle-right, among the pits.
Air Domain - Wizard and Big Box are both in the middle of the map.
Fire Domain - Both the Wizard and the Big Box are around the bottom-middle of the map.
Water Domain - The Wizard and the Big Box are both in the bottom-left.


Defeating the four simulacrums will result in Garwayen telling you that your spellcasting was a bit clumsy and wasteful. So, to give you another challenge, he summons four more for you to defeat. Don't worry, it's the last time you'll have to fight a fake wizard.
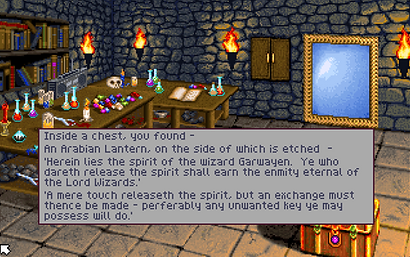
He will also tell you that this will be the last time he reveals the map and its contents for you. You'll need to learn the spells Revelation and Read Map, which are both level 2, one from the Earth Domain and one from the Ether Domain. You'll have to find the second level words first, of course. Garwayen tells you some of your allies might be able to help, and that if you want to, there's a chest in the Death Domain that will give you some clues. I'll tell you right now, the chest in the Death Domain isn't worth it, but if you're avoiding using the Spells Section of this website, you may want to run down there and search for the Big Box.
Before facing the new simulacrums, go back to Terra. You'll find that you have gained four new allies to help you. Seeing them all requires quite a bit of money, but you should definitely visit Ohio and Egypt for Golden Chalices, the Geisha in Japan for the 2nd level Fire Domain word (don't waste your money if you already have the word because your college is Fire), the Navaho Medicine Man in Peru for a quest that will get you the 2nd level Air Domain word (don't waste your money if you already know the word because your college is Air), and Stonehenge for the 2nd level Earth Domain word.

Return to your workshop and create, modify, upgrade your spells as needed, then begin the final part of Part One by defeating the last four simulacrums and collecting the Big Boxes. Once again, order doesn't matter, but if you need the 2nd level Air Domain word, collect the Big Box in the Air Domain first, then take the feather to the Navaho Medicine Man in Peru.
Earth Domain - Wizard in top-right, Big Box in top-left.
Air Domain - Wizard and Big Box both in the bottom-right*.
Fire Domain - Wizard in bottom-right, Big Box in the middle below the lake of lava.
Water Domain - Wizard around the left-top-center, Big Box in the bottom-middle-left.
(POTENTIAL EXPLOIT: The Big Box in the Air Domain contains a Golden Pomegranate (worth $25,000). Just like with the previous exploit, it is possible to collect this Big Box without defeating the wizard, then using Return Home. You can only do this twice, however, unlike the previous exploit. As long as you have an Air Feather in your inventory, the Big Box only gives 50 of each Component. So, get the box once, return the feather to the Navaho Medicine Man, then go back and get the box again. You'll end up with 2 Golden Pomegranates instead of just 1)
Upon defeating the last of the four new simulacrums, you will be informed that the most recent Wizard's Council meeting has just ended. Garwayen will grant you the title of Apprentice Wizard, and will teach you the second word of the Ether Domain, Kosmos (the last word you need to create the two spells Garwayen will no longer cast for you). Finally, he will give you a Totem for your magical college. A Totem holds a number of spells in it based on the level of the Totem and the level of the Spells. You set a spell set to the Totem in your Spellbook in your Workshop. The spells in the Totem are free, they cost no Components or Aspects, and the Totem reloads every time you leave a Domain. Setting Water Breath to a Water Totem and Magic Wings to an Air Totem is strongly recommended.
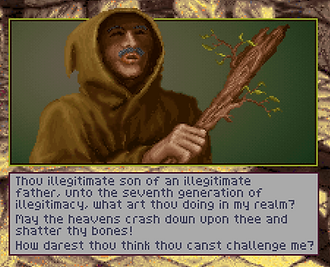
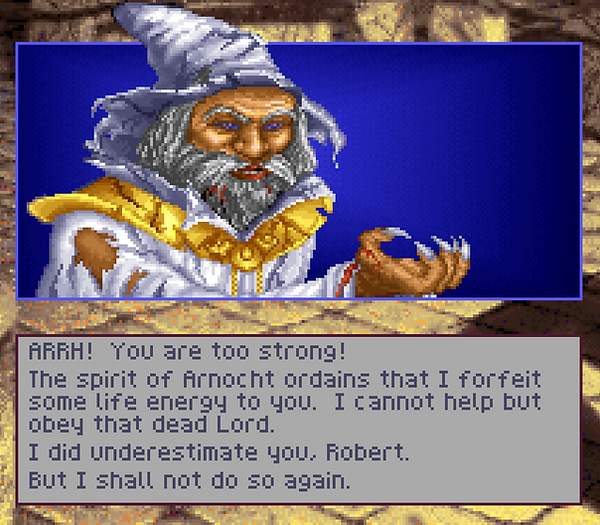
Before Garwayen can give you new instructions, you are visited by Arnocht the Great, the Lord Wizard of the Earth Domain. He and the other Lords are furious that you have been running around in their Domains. So they have placed Obelisk Generators within their Domains to keep you out. The Obelisk Generators constantly spit out new enemies until they're destroyed. Garwayen, of course, tasks you with destroying all the generators, and all the enemies, in each of the Domains as the start to Part Two.
Part Two: A Tale of Obelisks, Minions, and Expanded Horizons
There are several things you should do before entering into the Domains to deal with the generators.
First, go to the digsite in Alberta and talk to Jack to get the Serpent Blade, a petrified sword from a T-Rex.
Next, buy all the Components you need to restock. Make sure you buy Bottles of Yellow Liquid Aspects as well, and at least 5 Acorn Aspects (4 if your college of magic is the Earth Domain).
After that, return home to begin making at least 3 new spells, followed by some modifications and restocking.
Revelation and Read Map are required to see the maps and number of enemies/boxes remaining in Domains. The recipe for both of them is exactly the same. The only difference is that one uses the 2nd level Earth Domain magic word, and the other uses the 2nd level Ether Domain word. If Earth is not your college of magic, the Earth one requires 3 Aspects instead of 2.
Read Map: 2 Acorn Aspects, 9 Jewels, 5 Candles, 14 Stones - Magic Word Kosmos
Revelation: 2(3) Acorn Aspects, 9 Jewels, 5 Candles, 14 Stones - Magic Word Solum
The third spell you should create immediately is Create Light, a 2nd level Ether spell.
Create Light: 2 Bottle of Yellow Liquid Aspects, 6 Jewels, 12 Powders, 9 Stones - Magic Word Kosmos
Immediately modify it to its highest power: 10 Jewels, 22 Powders, 5 Candles, 17 Stones
Create Light allows you to destroy entire levels in a matter of moments, including obelisk generators. There are many other useful spells to learn, and you should definitely upgrade Star Healing to the new word. After all that, you need to go into each Domain and destroy every generator and all the summoned beings. There are no wizards, though.
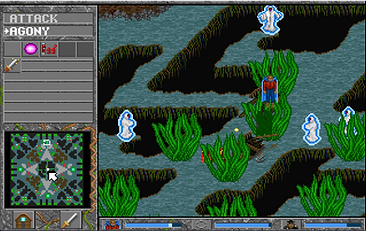
The hardest one to do is the Air Domain. While Create Light will damage obelisks, it will not hurt Illusions. So they have to be taken out by hand.
The Big Boxes in each Domain contain spell lists for that Domain's second level spells. The Big Box in your own college of magic contains a Golden Pomegranate. If you don't destroy the generator and just pick up the box, you can collect as many Golden Pomegranates as you want.
Earth Domain - Generator in top-right. Big Box in the bends of the river by the middle of the map.
Air Domain - Obelisk and Big Box are both on the middle island.
Fire Domain - Generator is in the top-left, Big Box is by the top-middle lake.
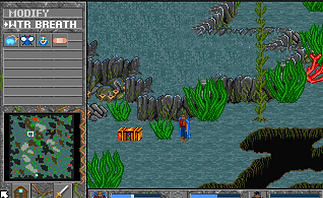
Water Domain - Obelisk is in the middle-left, between the three rocks, and there are two Big Boxes. The first is in the middle-right, containing a Viking Helmet and two Pomegranates, and the second is in the top-left.


In an unsurprising turn of events, Arnocht is not terribly happy about the fact you destroyed all the generators, although he does give you his grudging respect for doing it. Naturally, to make up for it, he sets you up with yet another round of generators. This time, there are two in every Domain. Also, the Lord Wizards believe you have become too familiar with their Domains, so they've changed all the maps on you.
Make use of Create Light to clear them out of the way again, and move on (I'm not going to include the images this time, since it's the same task, mostly). Boxes only give you 150 of each of the four Components.
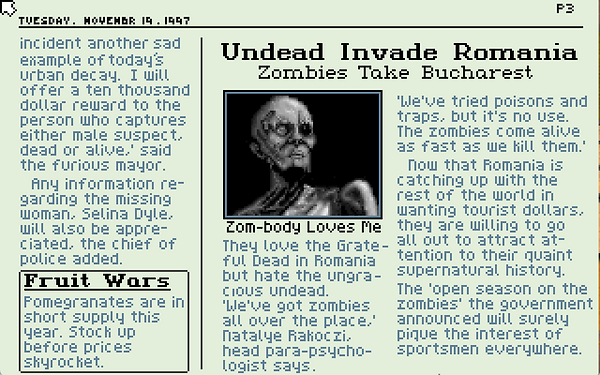
Before going to the Domains, go to Terra. Visit Chen in Ohio, then Natalye in Romania, and then return to Chen for a $25,000 reward. Talking to anyone else will just tell you to visit the Domain of your college of magic.
After restocking your supplies and your spells, it's time to go back to the Domains.
BE VERY CAREFUL ABOUT WHICH DOMAIN YOU GO TO FIRST!
You are supposed to go to your own Domain first, but you do not have to. The first Domain you go to, no matter which it is, you will have a new challenge. Instead of destroying generators, you need to fight the Minion Wizard of that Domain. Because finding where each Minion is located requires running four different games, I am not including the photographs of that either. But you should be past the point of needing your hand held by now anyway, right?
I recommend fighting the Air Minion, simply because in the Domain you go to you do not have to defeat all the enemies, and Illusions are annoying. But any Domain is a good choice.
YOU MUST GET THE BOX IN YOUR DOMAIN WHEN YOU GO!
Minion/Box combinations (this only applies when fighting the Minion):
Earth Domain - Wizard in bottom-middle area, Box in the very middle of the map.
Air Domain - Box and Wizard both in bottom-right.
Fire Domain - Box in top-middle, Wizard in top-right.
Water Domain - Wizard and one Box in bottom-right, second box in bottom-left, by Stonehenge.


The third-level magic word for your college of magic is in your own domain in a Big Box. No matter what order you take the Domains in, you need to get that word.
After that, it's back to destroying obelisk generators.
(if you did not fight the Air Minion, when destroying the generators make your way to Stonehenge as fast as possible. If you don't destroy the generators with Make Light, you can get a nearly infinite number of air-based Aspects by collecting the vials of Illusions dying against Stonehenge. They can't hurt it, so they just run into it and die in an endless succession)
Earth Domain - Big Box in bottom-right above river.
Air Domain - Big Box is in the top-middle.
Fire Domain - Box in right-middle.
Water Domain - First box in top-left, second on the ledge on the top-right.
After you finally defeat the second round of generators, the Lord of the Earth Domain returns to mock you, stating that while you were busy, they enlarged the rift between the two worlds. However, doing that has left them weakened, so, instead of facing you themselves and wiping the floor with you, they've told their Minions to deal with you.
As a reward, Garwayen gives you the title of Journeyman Wizard.
You must now face all four of the elemental Minions in their Domains.
Go to the Domain of your college of magic first. After you defeat them, go back to the Domain again and get the Big Box. You'll need the item there very soon.
There are three exceptions, but for the most part the Big Boxes in each Domain aren't worth it. The exceptions are two in the Air Domain, and one in the Earth Domain. They contain new equipment.
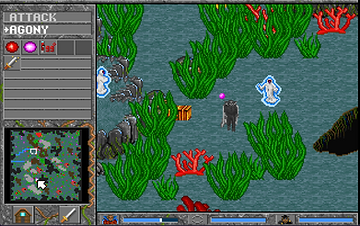
For the most part, however, the Minions are kind of disappointing pushovers at this point. Spam Create Light, use Mind Attack until their health is gone, then tap them with your sword. The Air Minion is difficult because of all the Illusions around them, and the Water Minion has a "fun" new spell that they like to cast: Invisibility. If you don't already have it, create the 2nd level Mind spell Detect in order to counter this. You won't be able to hit the Minion while they're invisible, but you can cast spells at them and track them with Detect.
Restock before you go. Both spells and supplies. Your allies will tell you to collect an item in a Domain after the Minion is gone. It is called the Orb of Eternal Enlightenment, and can be found under Stonehenge in the Air Domain.
Earth Domain - Minion is in middle-right. Big Box #1 is in the bottom-right, and Big Box #2 is in the top-right (this one contains Merlin's Hat, a new Helmet)
Air Domain - Wizard in the middle of the map. Two boxes are next to each other in the top-left, containing Thoth's Breast Plate of Power and the Lightning Sword, and one in the top-right has formulas.
Fire Domain - Wizard is in the top-right, and the single Big Box is in the little stone circle also in the top-right.
Water Domain - The Minion is in the top-middle, with the Big Box in the top-right above the chasm.
Each time you kill a Minion they will give you the 3rd magic word of their Domain, as well as a Totem in their college. Definitely use these to set up some free spells. Magic Wings for the Air Totem and Water Breath for the Water Totem are great ideas.


If you haven't done it yet, after defeating the four elemental Minion Wizards, you need to go back to the Air Domain and find the chest that is sitting just under Stonehenge.
As mentioned, it contains the Orb of Eternal Enlightenment, which you need for the next step.

After gaining the Orb of Eternal Enlightenment, you unlock the last two Domains of Valoria: the Mind and Ether Domains. Naturally, Garwayen tasks you with defeating the two Minion Wizards of these Domains.
Before facing these two Domains (which are annoyingly difficult), head back to Terra to restock. When you're there you'll find that many of your allies are gone. Don't worry, they're just looking for somewhere new to go until you defeat the last two Minions.
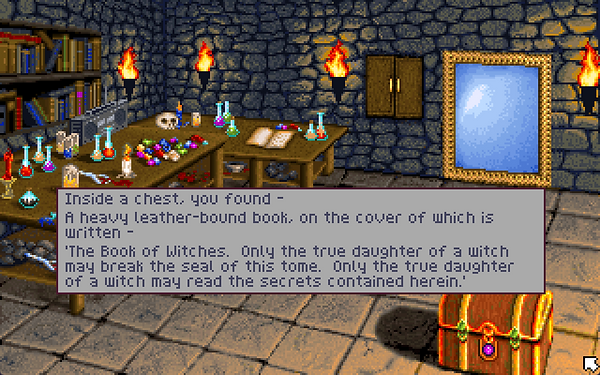
Talk to Selina in Agra, India to have her tell you that you're close to finding the Book of Witches, and that you should look for it in a place that is abnormal (which means the Mind Domain).
DO NOT MISS THE BOX THAT CONTAINS THE BOOK OF WITCHES! IF YOU DO, IT'S GAME OVER!

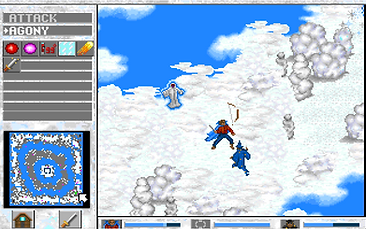
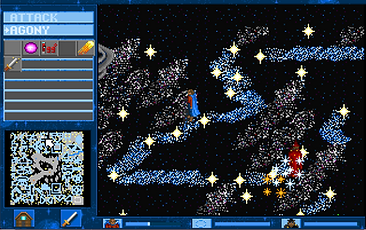
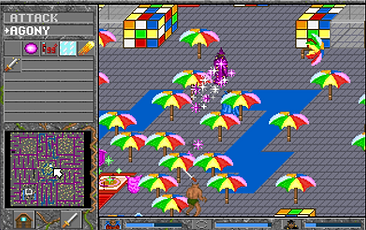
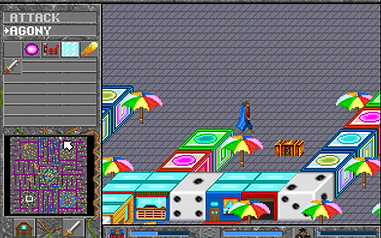
If you have somehow made it this far without creating Magic Wings, you MUST have it now to get through the Ether Domain. The world is filled with gaps and land that looks like gaps. It's almost completely unnavigable. But be warned, the Minion knows how to instantly cancel your Magic Wings. If a set of purple sparkles comes your way, get over land immediately, or you'll fall to your death. Meanwhile, in the Mind Domain, none of your movement spells will work, forcing you to walk a lot.
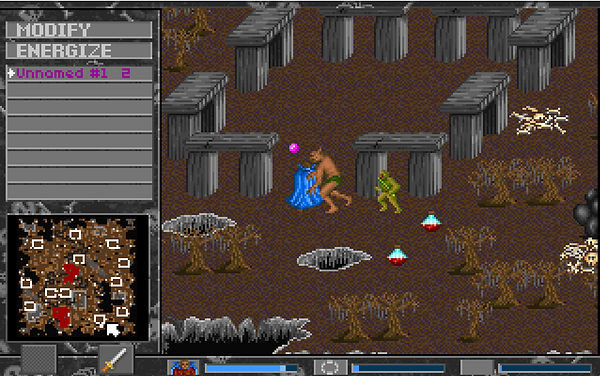
Each time you kill one of these Minions you'll gain the third level spell of their Domain. Getting the Ether word gives you access to the spells of Teleport and Energize, making the game significantly easier, while also upgrading your Create Light and Star Healing spells. The Mind word, meanwhile, increases the power of your Mind Attack and allows you to make Psychoimmune which stops you from being agonized by enemy spells, and Speed Time and Slow Time, which alters how you and enemies move (only Speed Time is really worth it).
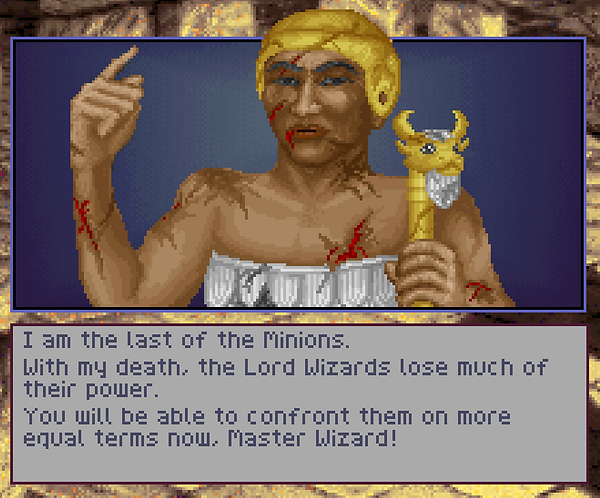
In any case, kill the last two Minions to end Part Two.
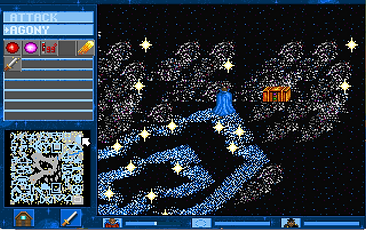
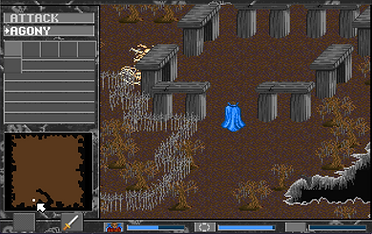
Ether Domain - The level starts out with a series of Explosion spells hitting you. Hide in Stonehenge and heal the damage before moving on. The Wizard teleports around the map, but can usually be found in the bottom-right to middle of the map. There are two Big Boxes. One is in the center-left, containing formula hints, while the other is in the bottom-right, and it contains the Damascene Sword, which cannot be equipped, but is a necessary piece of the best sword in the game.
Mind Domain - The Minion is in the hallways just south of Stonehenge. It's difficult to get to him without movement spells, but the good news is he can't use them either. Head all the way to the right, under the hallways he's hiding in, then use the platforms to go over the wall. There are EIGHT Big Boxes. Some of them contain formulas, half of them say things like "A duck quacks at you to get out!", and only one of them absolutely must be grabbed: The one by Stonehenge. If you fail to get this box, it's game over. But not right away, because that would be too easy. Much, much later in the game you will be told you missed an item, and that maybe you'll have better luck in your next life. Then the game will end. So you'll face all these trails after missing the box, only to be told oops, you can't win now. Don't do that. Get the box. Then immediately give it to Selina for a $100,000 reward.
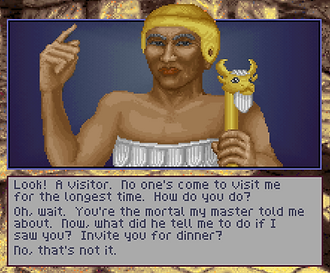


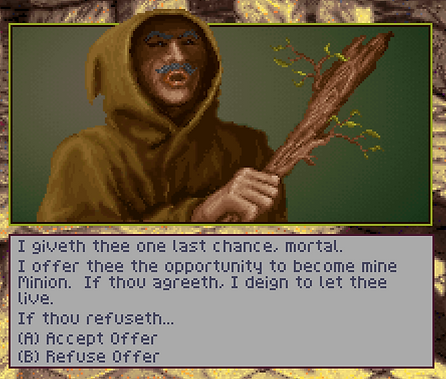
After you defeat both of the new Minions, the last one you kill will warn you to never become a Minion, because it ruined their life. Immediately after that, Arnocht will show up to ask you to become his new Minion. That he is actually impressed that you defeated all the other Minions.
You can (A) Become his Minion, or (B) Refuse. If you become his Minion, you lose the game. So... maybe don't do that.
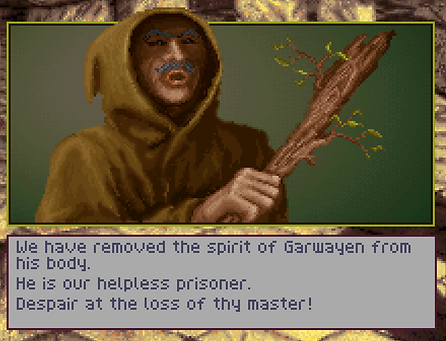
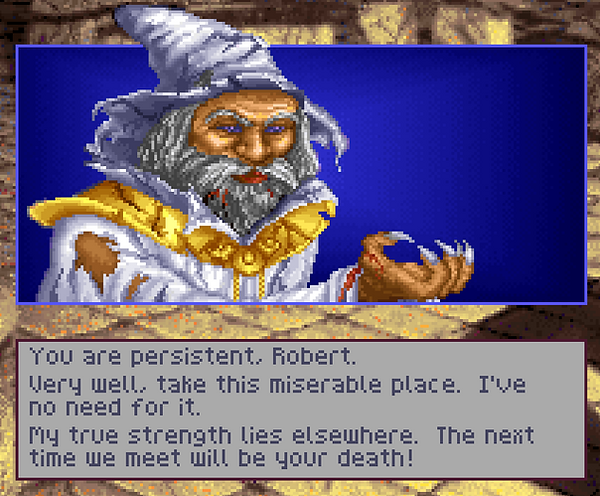
When you refuse to become his Minion he tells you that while you were distracted, he and the other Lord Wizards overwhelmed Garwayen and separated his spirit from his body. They then locked their Domains so that you cannot enter into them to save Garwayen. With a final taunt to tell you that you may as well quit now, Arnocht leaves.
End of Part Two
Part Three: Keys to the Kingdom and Lords of Magic
Whelp. You're Master is gone and the Lords have sealed off their Domains. That only leaves you two places to go: Your Workshop, or Terra. Start with Terra. If you haven't already given it to her, take the Book of Witches to Selina in Agra. If you didn't get the Book of Witches, load a previous save and go get it.
While out and about, buy Lemons & Red Roses if you don't have them. You need them for Energize and Teleport. If you don't already have them, you at the very least need Energize. It's the last spell that's required to beat the game (see the Glitches Section about the Unkillable Water Lord).
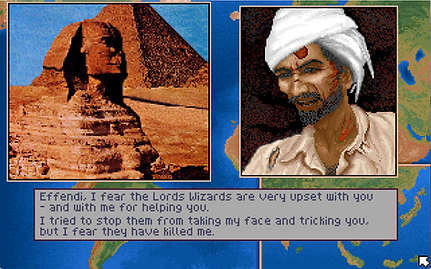
While you're in Terra, buy everything that Ali carries, but don't talk to him unless you're ready to watch him die. Ali is attacked by a demon for helping you, and is killed in the process. Whether or not you talk to him, he will disappear after these next to Minion Wizards are killed, though. So it's up to you if you want to see the extra plot point or just hear about it later. If you do talk to him, he'll tell you to search the Domain of your college of magic for the 4th level magic word, and then he'll give you his life savings, $5,000.
Talk to some of your allies to learn that a new, more powerful, Ring (Virachoca's Ring of Scintillant Rays) can be found in the Fire Domain the next time you go there, but that it will only be there for a limited amount of time, so be sure to get it. You'll also get a lot of clues about what Domains lead to what Domains, but those don't really matter.
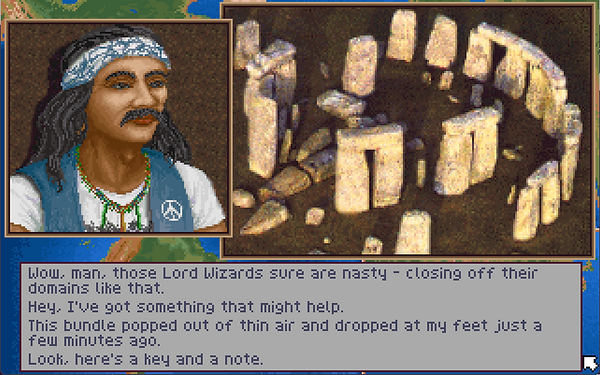
In order to continue the story, you need to talk to David in Stonehenge. He will give you a Key that suddenly dropped on his head. That Key unlocks the Water Domain, allowing you access to it. Before going, make sure you make the new spells you earned with the new magic words.


There are a lot of Big Boxes to grab as you go from here. Not to mention that the Domain of your college of magic also has one that contains your 4th level word. The goal is to go through each Domain and grab the Big Box that has the Key to the next Domain. I recommend getting all of the Big Boxes, even though most of them are useless, so that you get all the info you can. I, however, will only be showing you the locations of the Big Boxes that contain Keys. The arrow on the mini-maps will point to the locations. The exception will be the Fire Domain, as it also has the new Ring.
It is recommended you put Magic Wings into your Air Totem and Water Breath in your Water Totem (if you haven't already), and only use those Totem spells as you collect Keys. You don't have to kill anything, and there are no wizards to fight. So go, collect Big Boxes, and then return to your lab. Every level has at least one Big Box with various Pomegranates in them, so if you really want money this is a very good time to get it. In addition, there's a third EXPLOIT at the end of the Key run.
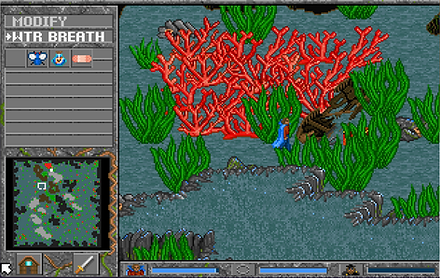
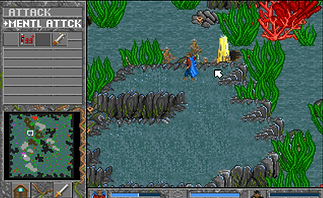
Water Domain - Key to Air Domain is in the top-left, behind some pink coral.
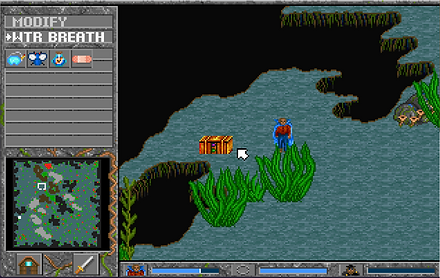
Air Domain - Key to Ether Domain is directly to the left of where you start.
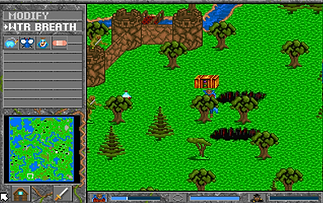
Ether Domain - Key to the Mind Domain is all the way to the right-middle.
Mind Domain - This one takes a while since it's the Mind Domain. The Key to the Fire Domain is on the right-hand side of the Domain, towards the middle-top by a pool of water.
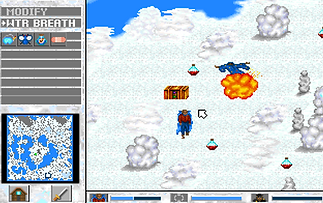
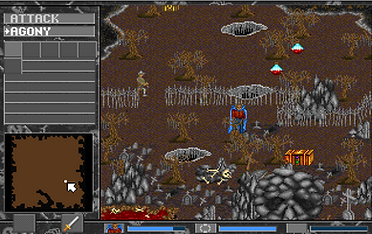
Fire Domain - The Key to the Earth Domain is in the bottom-left. The Ring is in the Big Box on the top-left.
Earth Domain - The final Domain, there is a Sapphire Pomegranate (worth $50,000) in the top-right*. To move on, and finally finish this Key search, go to the center of the lake in the bottom of the Domain and collect the Big Box with Garwayen's spirit in it.
EXPLOIT: The Big Box in the Earth Domain containing the Sapphire Pomegranate can be picked up multiple times as long as you do not get the box containing Garwayen's spirit. Level 3 Magic Wings on your Air Totem will get you to the box without using any of your spells. After that, Return Home, and repeat as many times as desired. Each one is worth $50,000, so you can get enough to buy out every supplier if you want to.


With the return of Gawayen's spirit, the Lord Wizards have finally decided to deal with you themselves. Before doing that, however, it's time to return once again to Terra, as there are a few new spots to check out before moving forward.
First, visit Jack in Dry Gulch, as he is holding on to a cool new sword that he wants to show off. He's less happy about the fact that the sword leaps out of his hand and into yours.
Next, head down to Senora Espirita to gain the 4th level Air Domain word. Why the Medicine Woman who deals mostly with fire has that word, I don't know, but she does, and it's worth it.
After that, head down to Sri Lanka to visit Pendragon Clerke. This time he isn't being impersonated by a demon. But he's very interested in the Damascene Sword you grabbed from the Ether Domain when fighting the Minion there (you did grab it, right?). He'll give you $50,000 for it. He'll notice some writing on it, which contains some formulas and a request to bring the Jawbone of the Auk to Pendragon. He has no clue why, but it'll be worth it.
For a small $1,500 reward, you can go to Transylvania and talk to Natalye. She'll buy back the Amulet of the Evil Eyet that you picked up much, much earlier. It's not really worth it, but there's no point in holding on to it anyway.
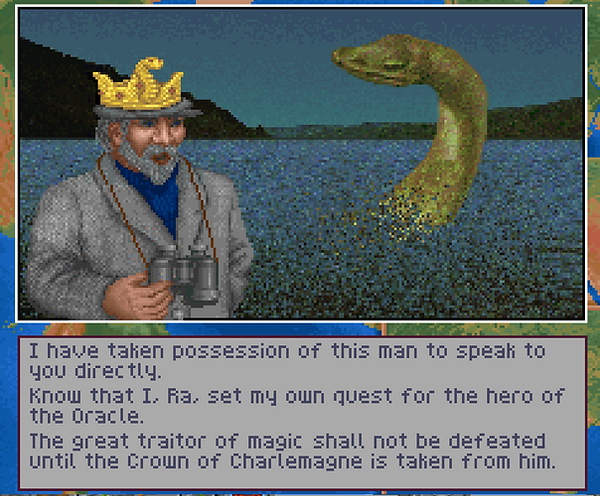
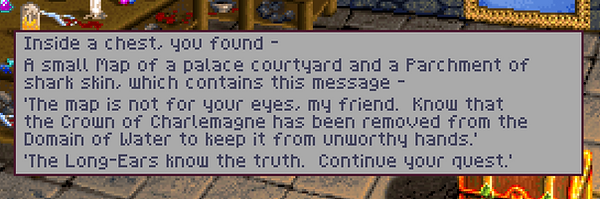
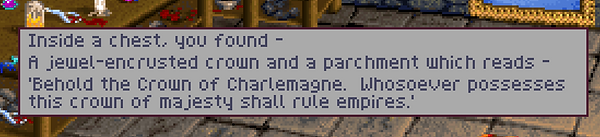
Finally, visit Thockmorton at Loch Ness. He asks you to find the Crown of Ra, which is supposed to be somewhere in the Mind Domain. You must take it to him before defeating all of the Lord Wizards, so don't save the Mind Domain for last. He will tell you that you need to find the Crown of Charlamagne after removing the "Great Traitor" from the Water Domain. Thockmorton will then give you $10,000 for bringing him the Crown of Ra.
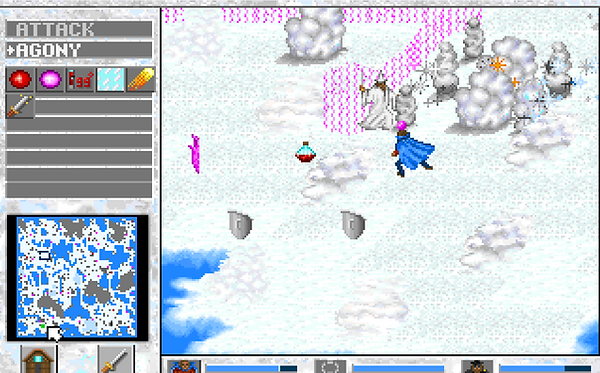
Once you've sold all your Pomegranates, stocked up on supplies, and visited your friends, it's time to make a couple of spells and then start killing Lord Wizards. Update any Air spells you have with the 4th word, and then make some new ones if you feel inclined. Snowstorm, a level 4 Air spell damages everything in a Domain, and can be paired with Create Light, so I recommend that one, at least.
In any case, the first place you should go is the Domain of your own college of magic. After you defeat that Lord Wizard, visit David Greenbriar to learn all four 4th level words of the elemental colleges.
Each time you defeat a Lord Wizard, Terra changes a little. Some people have more to say, some do not change their dialogue for the rest of the game.
After you kill four Lord Wizards (any four will do), you'll then gain the final two magic words in the game, the 4th level words for Mind and Ether.
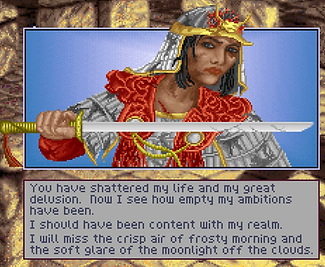
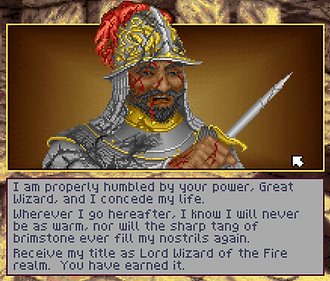
Every time you defeat a Lord Wizard you will be given the option to either A) Spare their Spirit, or B) Destroy their spirit. If you Spare them, you will gain some aspects and lifeforce, and you'll have an easier time against the final boss while in that Domain. If you Destroy their spirit you will gain no aspects or lifeforce, but if you Destroy the Ether Lord's Spirit you will gain the 4th level words for Mind and Ether early, and the final boss will be more difficult. It's up to you what kind of difficulty you want.
Whether you destroy their spirits or spare them, the elemental Lord Wizards will give you their Totems.
Earth Domain - Arnocht is in the top-center, beyond the pits. The Big Box is in the top-left. It contains the Pendant of the Lizard King, an upgraded amulet.
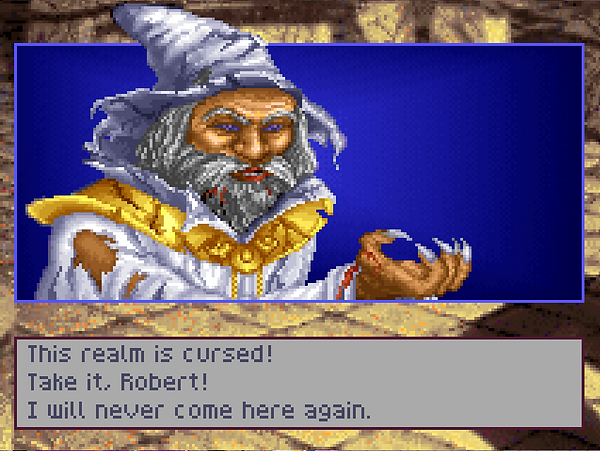
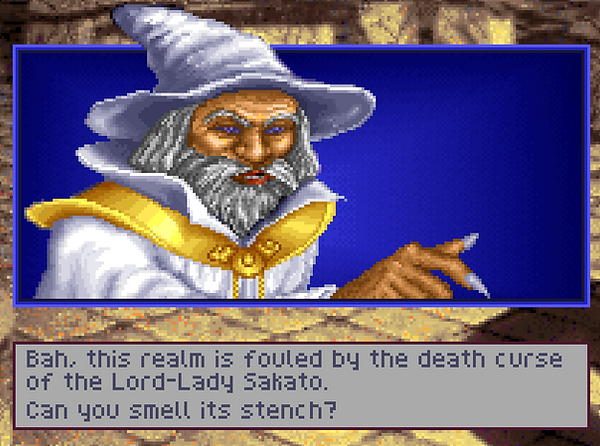
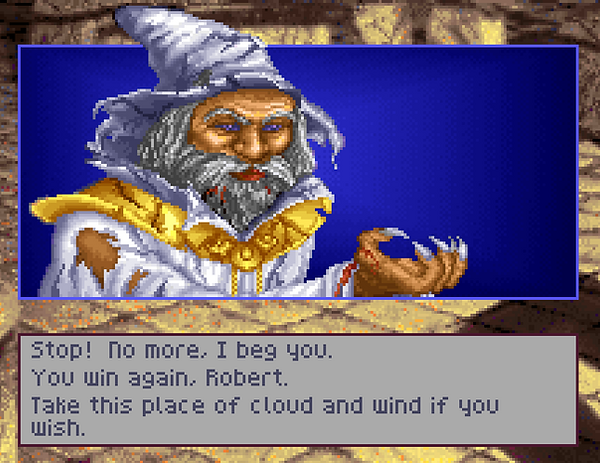
Air Domain - Lady Sakato is in the bottom-right. There is no box here.
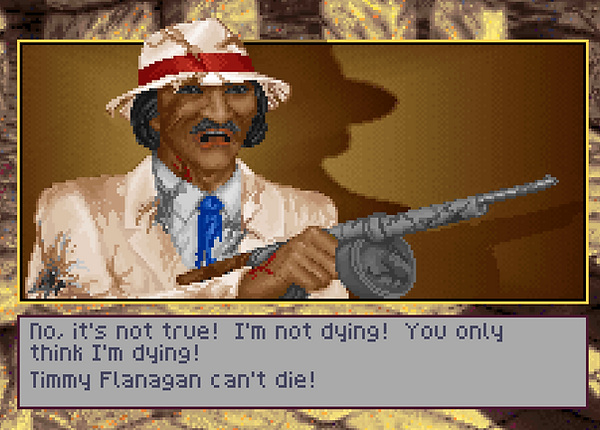
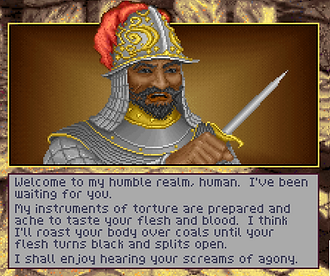
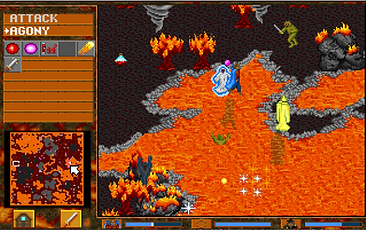
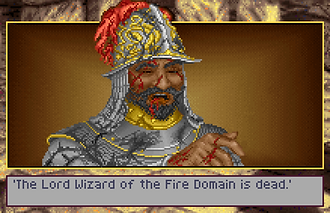
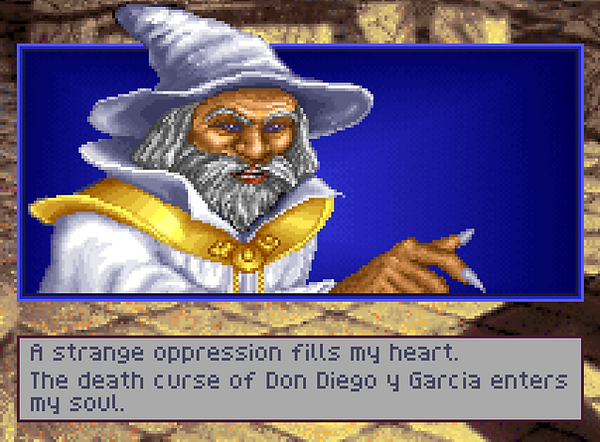
Fire Domain - Don Diego y Garcia is hiding on the right-hand side of the map, close to the top (usually over lava), but there is no box.
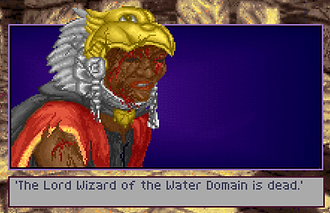
Water Domain - Quechequatl is in the middle-right, while the Big Box is in the middle of the map (a Pomegranate and a Sapphire Pomegranate are in it). GLITCH! The Lord Wizard of the Water Domain cannot be killed unless you use the Energize spell to make yourself stronger!
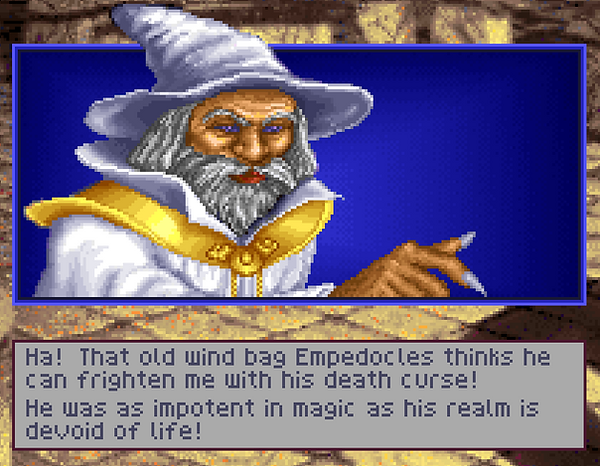
Ether Domain - Empedocles teleports around a lot, but can generally be found in the top-right. There are two boxes, one in the top left that just has a note in it, the other in the top-right has another Sapphire Pomegranate.
Mind Domain - Ur-reth can be found in the center of the map, behind a large wall. There are three boxes that can be found: A Sapphire Pomegranate in the Center, the Crown of Ra can be found in the top-right, and the Pearl of the Beloved in the bottom-right. YOU MUST GET THIS ITEM OR YOU CANNOT WIN THE GAME!


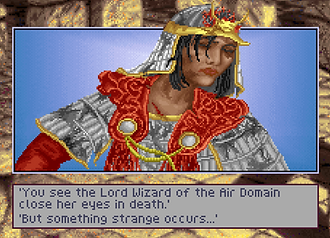


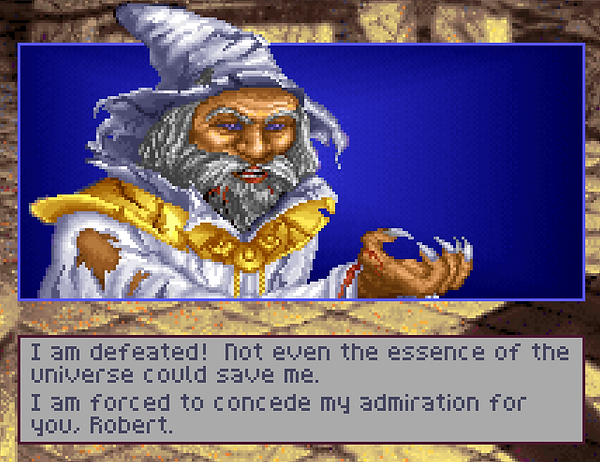
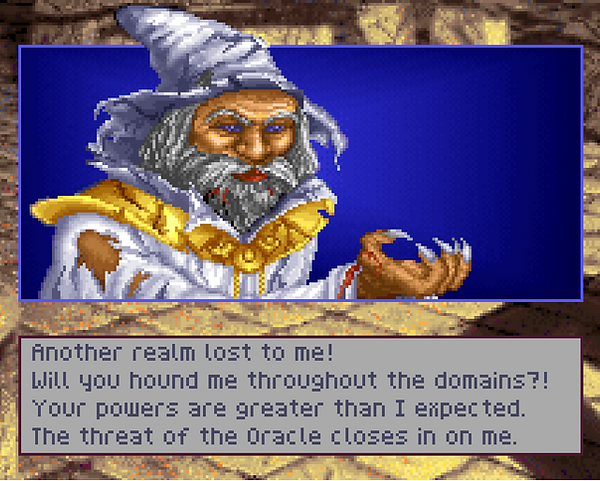
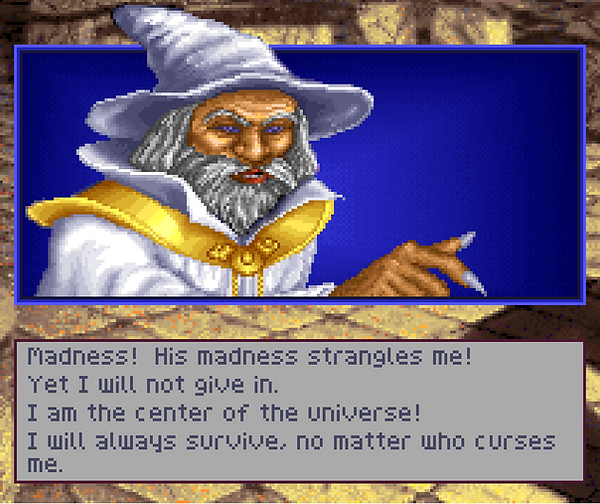
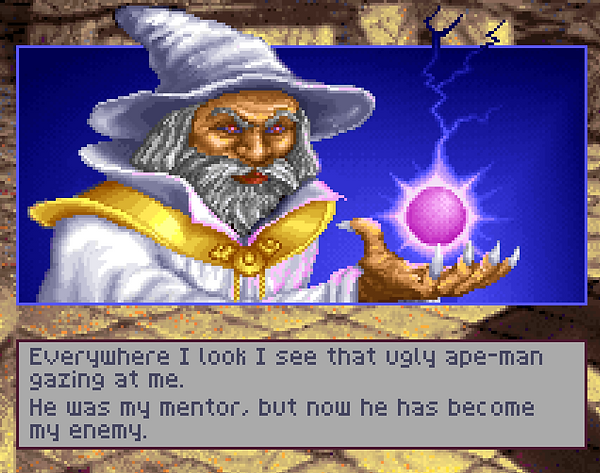
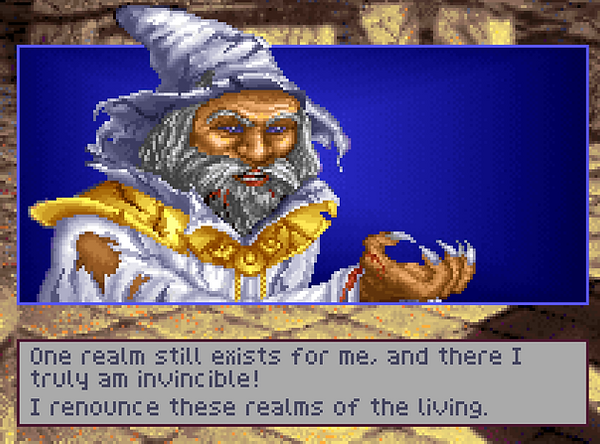
When the final Lord Wizard is defeated, a cloud of smoke will envelop the spirit of Garwayen...
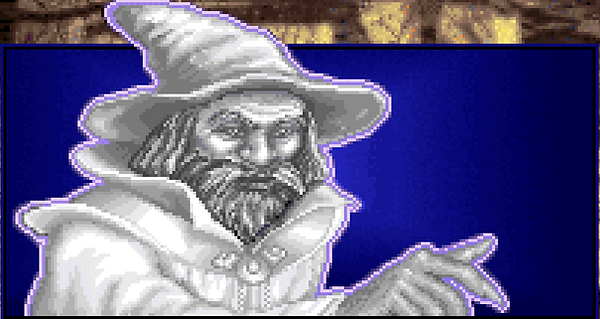
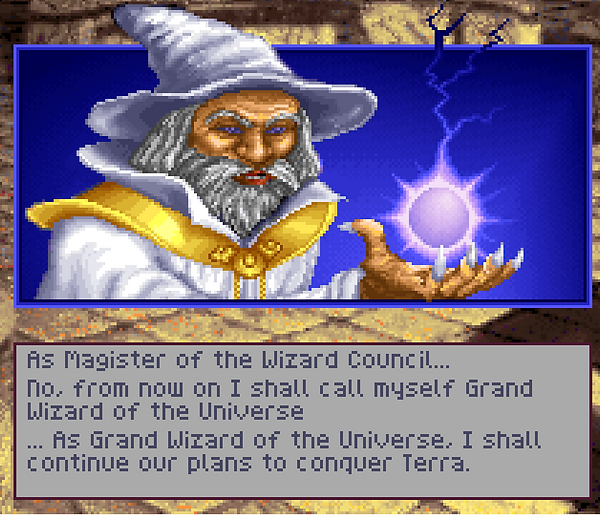
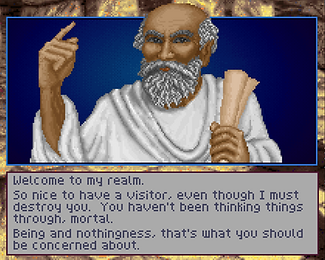
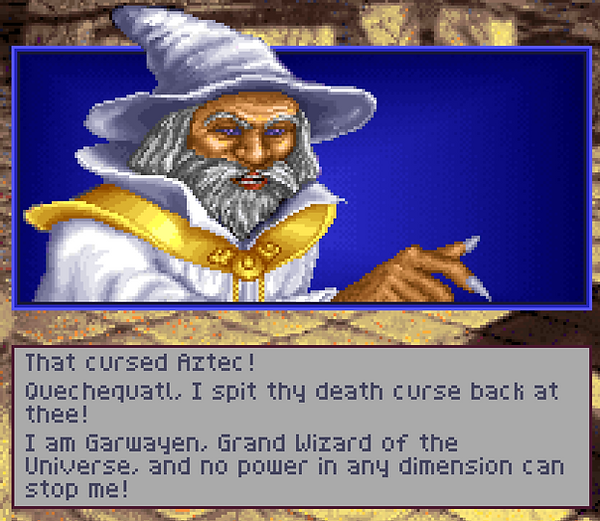
And the final boss of the game will be revealed. It's your mentor, Garwayen! He was never in any danger at all, but was merely biding his time while you killed off his rivals. Everything was his plan from the very beginning, and you were just a pawn that he used to achieve his ends.
As the newly self-titled Grand Wizard of the Universe, Garwayen runs off to the Domains to continue his work to tear open the rift between Terra and Valoria.
End of Part Three.
Part Four: The Grand Wizard of the Universe
The betrayal of your mentor is a shock to everyone. To prove it, head back to Terra and talk to all your allies. Many of them have moved for the last time. They won't really have much to say, but it's nice to visit sometimes.

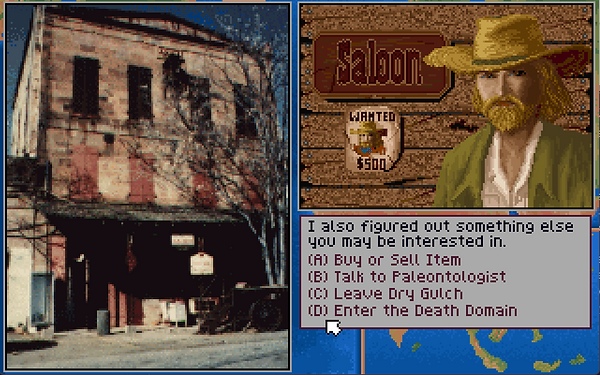
The one stop you definitely have to make is to see Selina at the Lascoux Caves in France. Give her your Pearl of the Beloved, and she'll give you the skull of the Marquis de Sade. If you've been talking to everyone in Terra often, you'll know that the skull of the Marquis de Sade will open a portal to the Death Domain from Dry Gulch. You still can't use spells there, though, so there isn't much of a reason to go there. Yet. But you still need it.
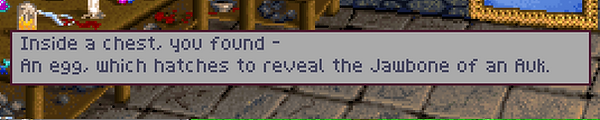
A couple of your other allies remind you to search for the Jawbone of the Auk. It can be found in the Earth Domain, which, ironically, is exactly where you have to go first.
Garwayen is hiding in one Domain at a time. Visiting a Domain he isn't in will just result in fighting random enemies. But if you're short on supplies, go ahead and fight around in there (though I doubt there's anything you can't buy at this point).
Each time you defeat him, and especially each time you get a new Big Box, you'll want to go back to Terra to see what's changed. DO NOT SELL THE SKULL OF THE MARQUIS DE SADE!
So, first stop (after restocking spells) is the Earth Domain.
Earth Domain - Garwayen is in the middle of the map, while the Big Box containing the Jawbone of the Auk is on the left-hand side of the map, in the center. Get the Big Box first. A weird Glitch causes Stonehenge in this level to drastically lose health the moment you kill Garwayen. If it gets destroyed, you have to die to fix it. So get the box, then defeat him, then immediately Return Home.
With the Jawbone of the Auk on hand, it is time to take three trips in Terra before moving on.
1. First, go to Sri Lanka and talk to Pendragon Clerke to give him the Jawbone. It will be come a Native American spirit doll.
2. Visit the Navajo Medicine Man in Mesa Verde, Colorado, and give him the doll. He'll give you $5,000 and then tell you to have your ally speak the names of three Wise Men.
3. Return to Pendragon. He will speak the three names, and the Damascene Sword will transform into the Sword of the Magi, the most powerful sword in the game. Naturally, Pendragon gives it to you to use against Garwayen.
Speaking of Garwayen, he has fled to the Water Domain, so that's the next stop. Remember, the Crown of Ra told you that Charlamagne's Crown was thrown into the Water Domain, so be sure to get the Big Box.
Water Domain - Garwayen is running around north of Stonehenge. More than any other time, he abuses the spell Invisibility, so make sure you have the Detect spell ready to go. The Big Box, meanwhile, can be found to the left of the south-most chasm.

If you've been talking to all your allies, the clue to talk to the Long Ears is fairly obvious: You have to visit Thockmorton on Easter Island. He will tell you that one of the wooden tablets he found on Easter Island said that a "Story-teller" knows the truth. You know who the story-teller is, right?
Go to Lotus Flower, the Geisha, in Tibet. She will tell you the true location of the Crown of Charlemagne: the Death Domain. Good thing you are able to go there at will now by visiting Dry Gulch.
Which makes that you're next step. Go to Dry Gulch and enter the Death Domain to get the best helmet in the game. HOWEVER, there is a Glitch in the game here. If you go in through Dry Gulch, you have to go through the level TWICE. When you go into Stonehenge, you'll get the notification that you got the Crown of Charlemagne, and then you'll be restarted back at the beginning of the Realm. The second time you go through, everything works fine.
Or, just go to your Workshop, and "make" a spell (I usually just use the first aspect (fishhooks) and the first magic word I land on). Dying naturally apparently bypasses the Glitch. No, I don't know why. So it's up to you which way you go.
With the Crown of Charlemagne in your possession, it's time to go to the next Domain that Garwayen is hiding in: Ether.
Ehter Domain - Garwayen has a fairly set path that he takes, including teleporting near Stonehenge after a few minutes. So you can look for him (he teleports around a lot), or you can just go to Stonehenge and wait for him to show up. It'll mean fighting off quite a few minion creatures, but it's up to you. This is one of the two hardest fights in the game, simply because of the Domain. But there's no Big Box to look for, so just take out Garwayen and move on.
Since there was no new box or anything new, all you have to do is restock your spells, chat with some of your allies, and move on. One thing to note, however, is that Selina is looking for yet another item. She believes that if you have it in your possession, you'll be able to use magic within the Death Domain. Keep coming back to her to see if she's figured it out yet.
In the meantime, it's time to go to the next hole that Garwayen is hiding in: the Fire Domain.
Fire Domain - Both Garwayen and the Big Box are in the top-right of the map. The Big Box contains the final necklace of the game, a Necklace of Bones.


There's no reason to go back to Terra unless you need supplies, but if you do go around and talk to your allies you'll notice they're starting to talk about some kind of anti-hero. Someone who will build a realm of Steel. They also say that once you've defeated your former Mentor, the anti-hero will be revealed. Sadly, this never comes to pass, as it seems to be the basis of the sequel that never came to be.
Anyway, reminiscing aside, the next Domain is the most annoying in the game, both because of a Glitch and because of the fight, itself. You have to fight Garwayen in the Mind Domain. The Glitch, however, is that the first time you go into the Mind Domain during the Garwayen run, the game refuses to accept that he dies. Even if you win, it counts as a loss.
To get around this glitch, as soon as you enter the Mind Domain, leave again by using Return Home. Then go back. The game will count it as a loss, but it will let you beat him for real now.
Mind Domain - Garwayen is hiding behind Mental Walls in the bottom-right. The last Big Box of the game (which has disappointing contents), is in the top-middle. It has a single, regular, Pomegranate.

There's only one Domain left, and once again no reason to return to Terra unless you need some kind of supplies. After that, it's time to take Garwayen on in the last Domain, the Air Domain.
Air Domain - There is no Big Box, and Garwayen is in the bottom-left of the map. Go get him.
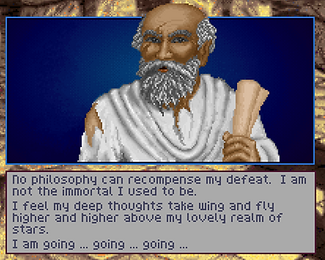
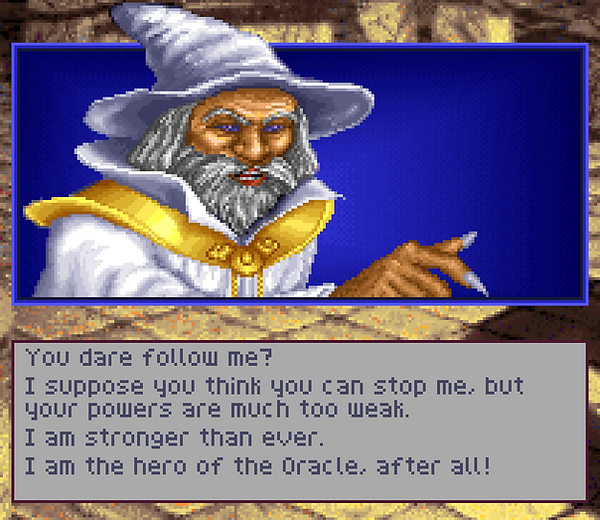
After defeating Garwayen in the final Domain, he makes a not-so-surprising announcement:
In other words, you need to face him one last time, in the Death Domain.
Too bad your magic doesn't work there.
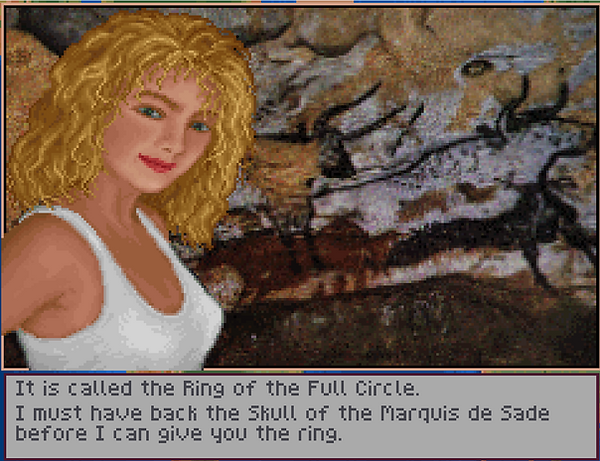
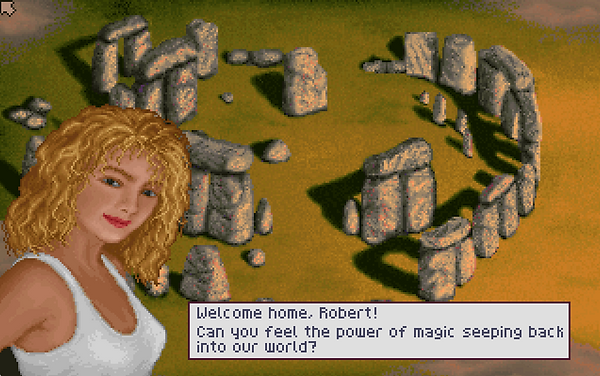
Time to see what Selina needs to fix that little issue. Head to Terra and visit her in the caves of France. As soon as you walk through the... door?... she rushes up and kisses you. In case you hadn't noticed, she loves you, despite you never saying a word in the game. Maybe she likes the strong silent type? Anyway, she promises to meet you at Stonehenge after you finally defeat Garwayen for the last time.
She tells you that she has an item that will let you use your magic in the Death Domain. It is called the Ring of the Full Circle. But to get it, you have to giver her back the Skull of the Marquis de Sade. Which means if you sold it at some point, you have to go buy it back.

With the Ring of the Full Circle in your hands, you can now, for the first and only time, use your magic in the Death Domain. Since that's where Garwayen has decided to have his last stand, that's where you'll need to go.
This is it, your last fight of the game.
Before going in, fill up your spells. There are technically two parts to this last stage, one with a fight, and then another without. So be sure you have enough spells to deal with two levels. Otherwise, just go to Dry Gulch and enter the Death Domain like the Hero of the Oracle you are.
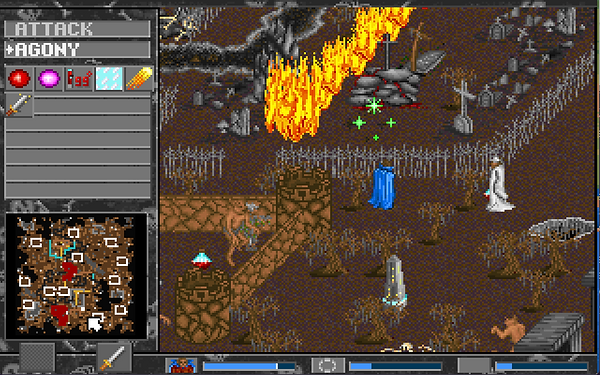
Death Domain - Garwayen, Magister of the Grand Council of Lord Wizards, Grand Wizard of the Universe, can be found at the bottom-middle of the map. I'd tell you he's next to Stonehenge, but... there's a lot of them. Most of them will get destroyed in this fight. It's okay. When you defeat Garwayen for the last time, enter the Stonehenge (broken or not) above where he was (the bottom-middle-ish one).
After finally defeating Garwayen for the last time, you decide to read about the prophecy that started this whole mess. However, to do that you have to find Garwayen's workshop.
You are returned to the Death Domain. You can still use magic, but your Read Map and Revelation spells no longer work (not sure if it's on purpose or a glitch). You must travel through the Death Domain until you find the right Stonehenge to enter. Entering the wrong one will restart the level.
Final Death Domain - The correct Stonehenge is on the left-hand side of the map, near the middle. It is down a narrow path with chasms on either side. The pathway is marked by a skull-shaped rock. There are enemies here, but no wizard. Either use your magic to clear the level, or Teleport or Magic Wing your way across the map if you're in a rush.

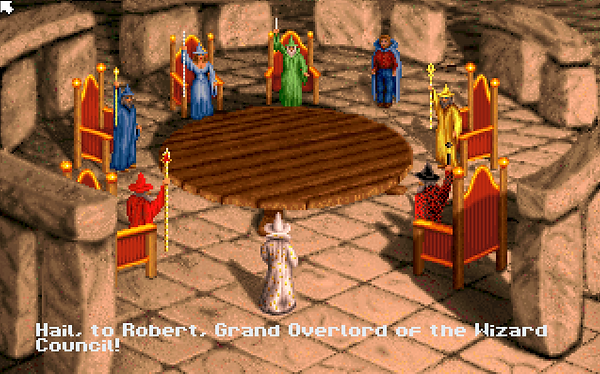
Upon entering the correct Stonehenge, you will discover a shocking secret:
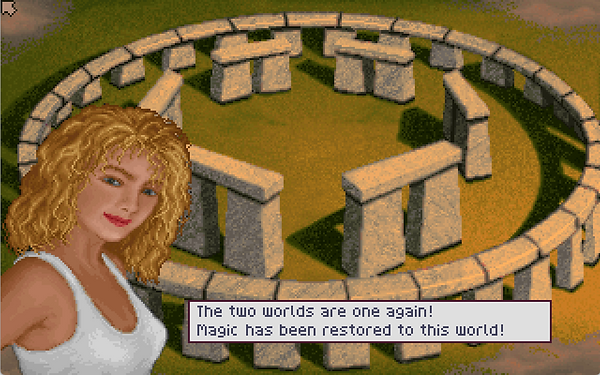
All the Lord Wizards, including your Mentor, are alive and well! Even more shocking, there were never any Minion Wizards. The Lord Wizards were just pretending to have and be Minion Wizards to test you. This entire thing has been a test to see what kind of person you were, and if you were truly the Hero of the Oracle. Now that you've proven yourself, it is time to bring magic back to Terra (oh, right, the whole danger to both worlds thing was a lie).
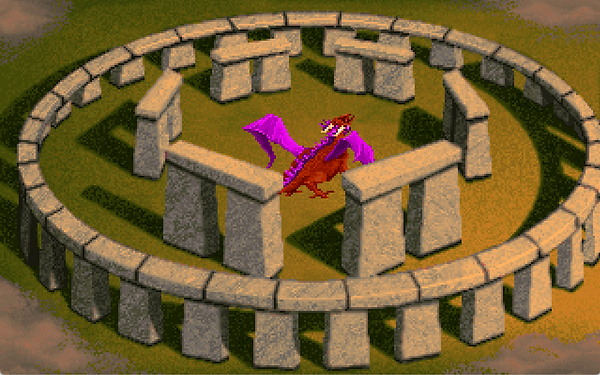
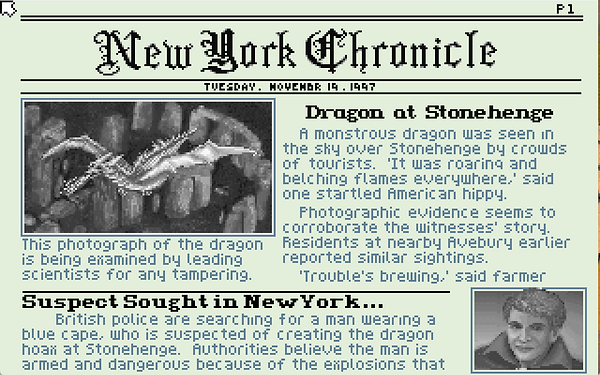
Once you bring magic back to Terra, and fly away with Selina, you'll get the final bit of the story in the form of newspapers. I will include them here, so... even more spoilers ahead.
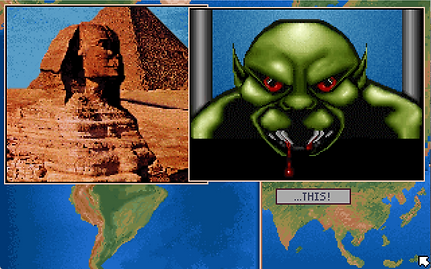
The main point, however, is that with your restoration of magic to Terra, the anti-hero, your double in every way (theoretically including having your face) appeared in New York City, and the two of you had a massive magical battle through the city. Unfortunately, your opponent fled, kidnapping Selina in the process.
And so SpellCraft 2 is set up. You must deal with magic becoming part of the real world, assert your power as the Hero of the Oracle, face down the anti-hero, and rescue Selina. Unfortunately, that game never happened.


I hope you enjoyed both the game and this walkthrough. I encourage you to try again with a different college of magic, or by making the game more difficult by Destroying the spirits of the Lord Wizards (won't actually change the ending). There are dozens of spells and lots of ways to play.